Disney Themed Ios 14 Home Screen
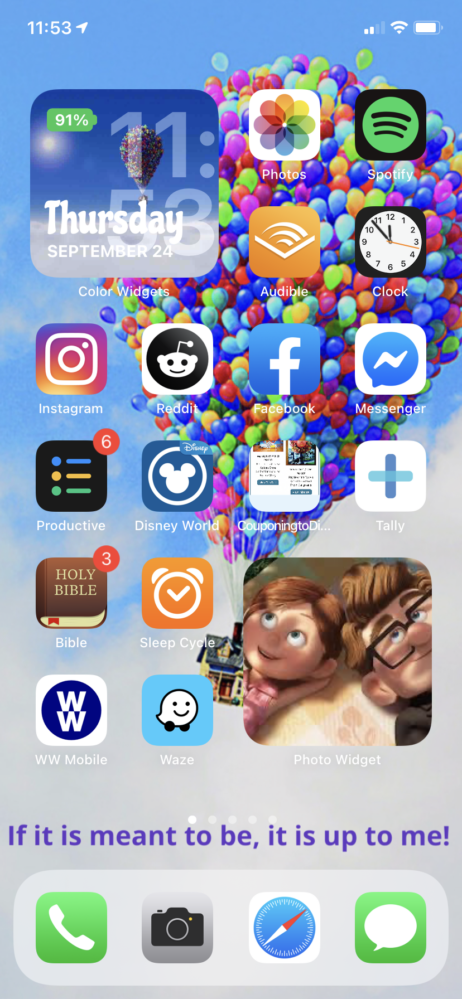
Want to Disney iPhone Widgets to customize iphone home screen?
You can now customize your iPhone with your Disney style thanks to the rollout of iOS 14.
Including the option now to display various widgets on each of your phone's home screens (pages of apps).
Plus choose to add shortcuts to your must used apps. This will let you select your own Disney pictures to be featured on the app instead of the traditional app's logo.
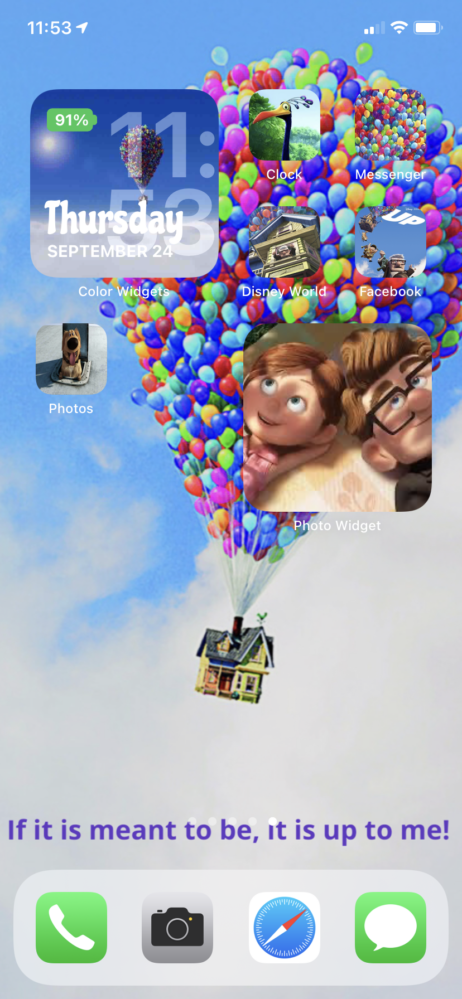
Up is my favorite movie. I added shortcuts to some of my most used apps to replace their main cover. I started the process and decided to stop to teach you.
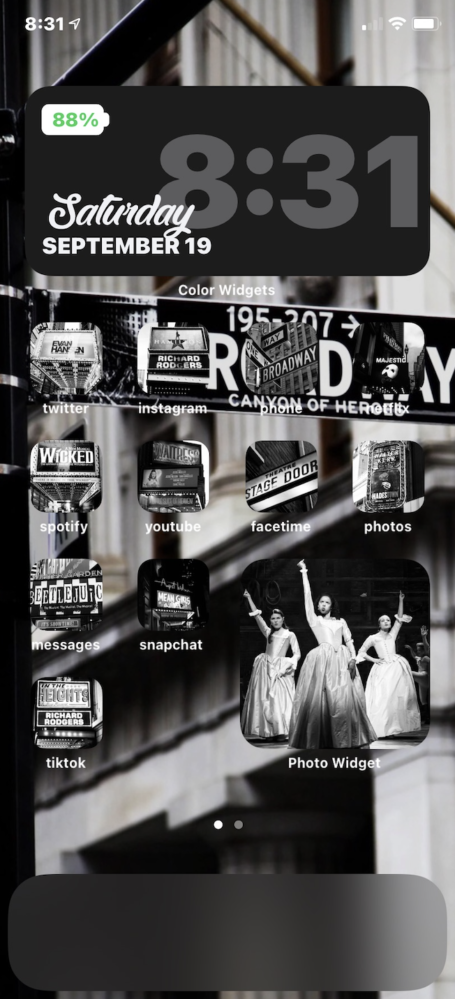
I'm kidding. My 16-year-old is going to teach you. Check out her awesome Broadway themed iPhone home screen she made.
Disney iPhone Widget Steps
#1 – Update to iOS 14
This won't work if you haven't ran the latest update. You might need to go into your phone's settings and force the update to run.
#2 – Update Your Wallpaper for Disney iPhone Widgets
If you haven't chosen a Wallpaper you love yet, now is the time to update it. I just searched "Up Wallpaper" in Google to find a picture I wanted to use. Plus I added my current favorite quote by putting it into Picmonkey and typed the text on the image so it would appear above the phone icons. Finally, I saved it to my phone and chose it as my Wallpaper.
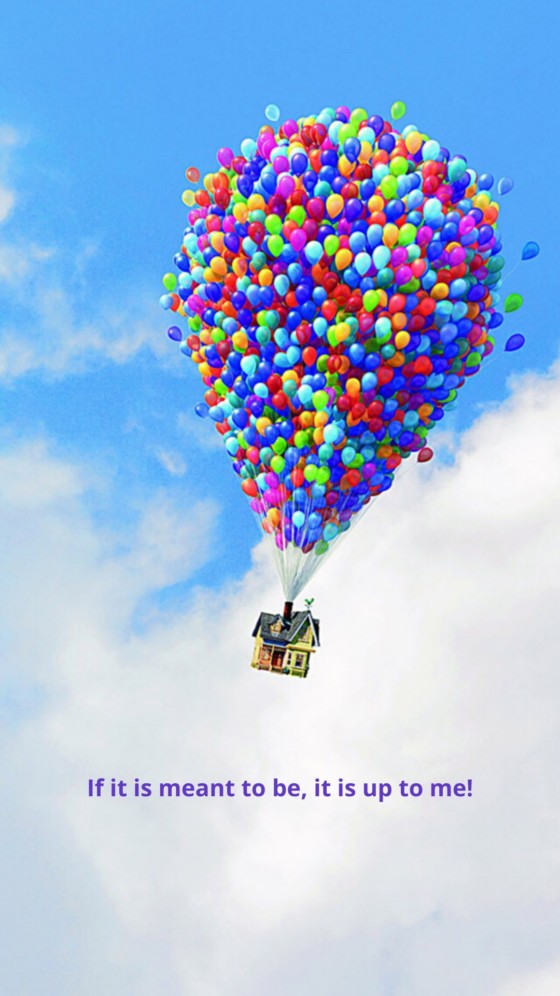
How to set your wallpaper:
- Open Settings
- Tap on Wallpaper
- Tap Choose a New Wallpaper
- Select Dynamic, Stills, or Live
- Select the Wallpaper you want to use
- Adjust the picture to your liking
- Tap Set
- Choose if you want it to be your lock screen, home screen, or both
#3 – Download Apps to Start the Customization for Disney iPhone Widgets
Tip: Find all the photos you want to use before you start the process and add them to your iPhone's favorites.
You will need to go to the App Store to download apps to help you with the customization.
Color Widgets
Color Widgets is going to allow you to put the time, day of the week and most importantly…your battery percentage on your home screen.
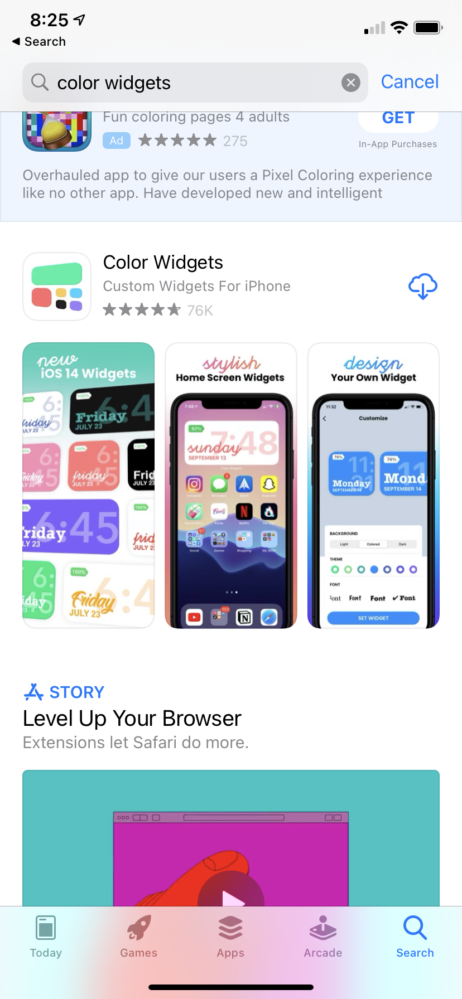
Once you locate Color Widgets in the App Store, download it and open it.
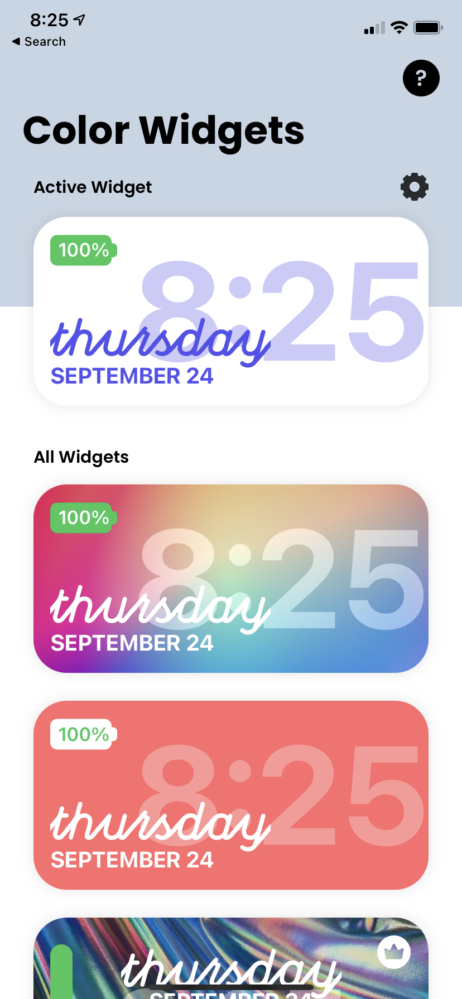
Scroll to choose the battery/clock/date interface you'd like. You can customize the picture so focus on the location of the info versus how the background looks.
Once you have decided on the one you like, click on it and select "Edit Widget"
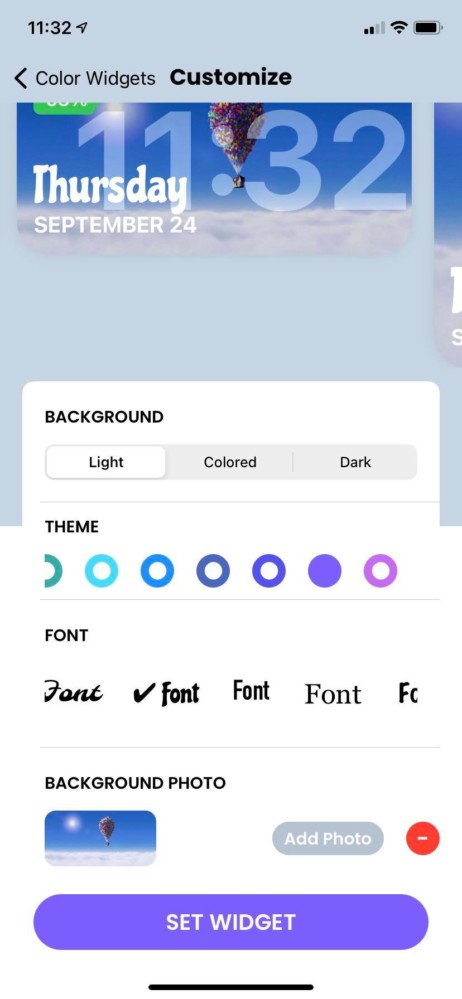
Choose the size you'd like, the background, theme, font and then choose your photo. Just click on the "add photo" button to find it.
Choose a photo that you think will look good behind the clock. I went with a picture of the Up Balloon floating through the sky.

Once you have completed the tasks, click on set widget.
#4 – Add Widget to Your Home Screen
In the iOS 14, there is a new way to add widgets to your home screen. On the iPhone, hold your finger down on any app for 3 seconds and a screen will pop up that says Edit Home Screen.
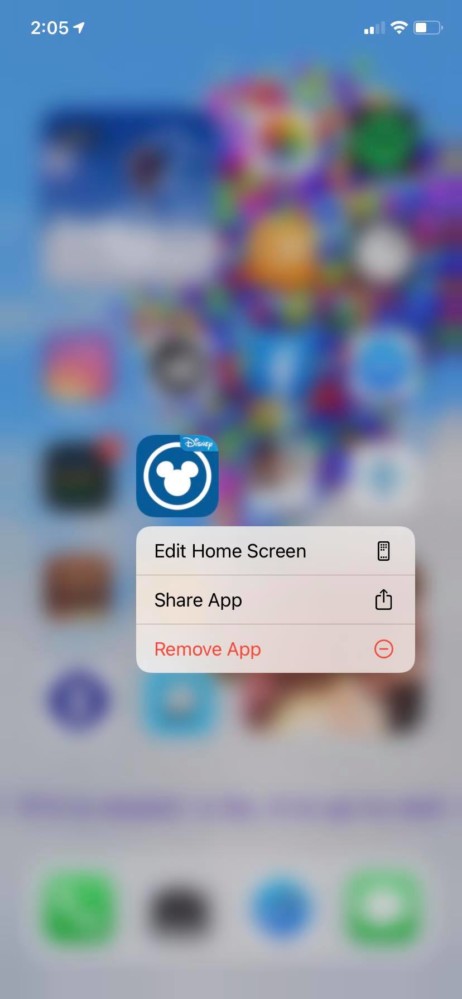
Click on "Edit Home Screen" and then your apps will start to vibrate. There should be a plus sign in the upper left corner of the screen. Click on it.
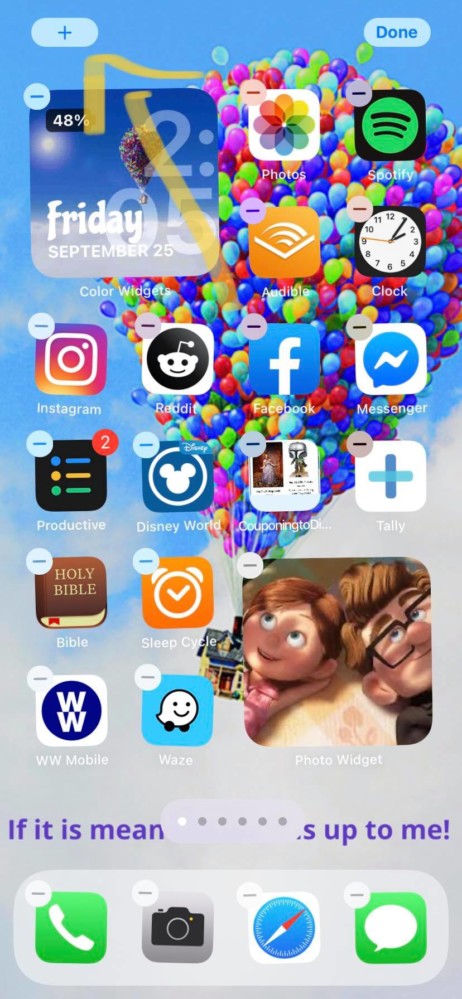
Once you click on it, scroll down to select Color Widget (you might have to scroll way down the list to locate it).
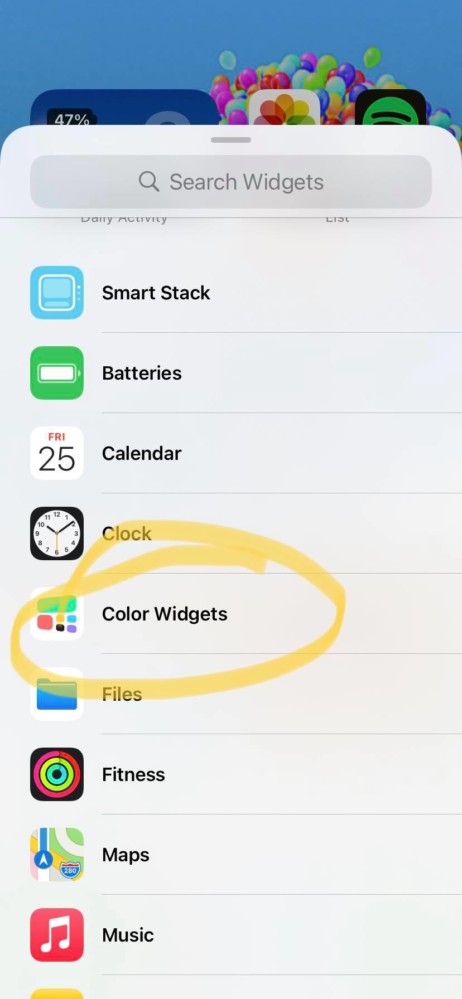
Once you click on it, you'll be able to select the widget you had customized.

Drag it where you want it to place it on your home screen.
Phew! The first customization is done!
![]()
Photo Widget
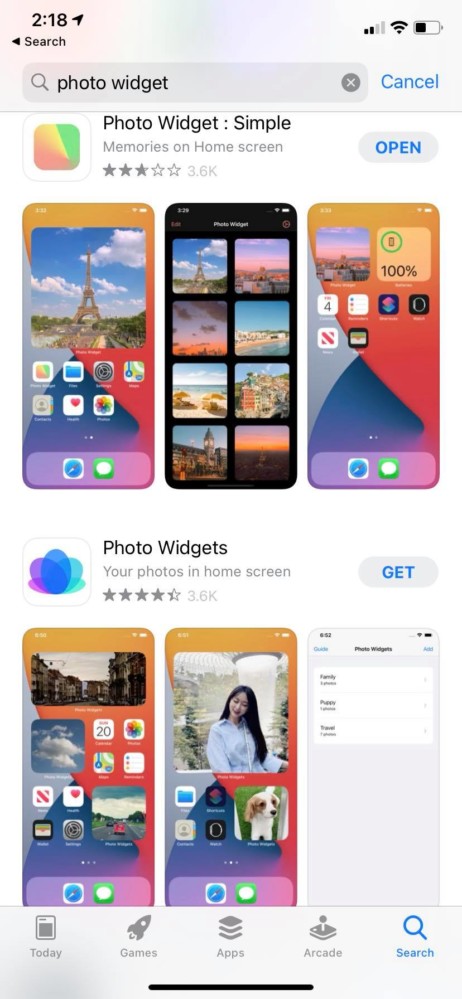
The next app for the tutorial is the Photo Widget: Simple from the App Store. There appears to be different ones you can use, but this is the one we started with.
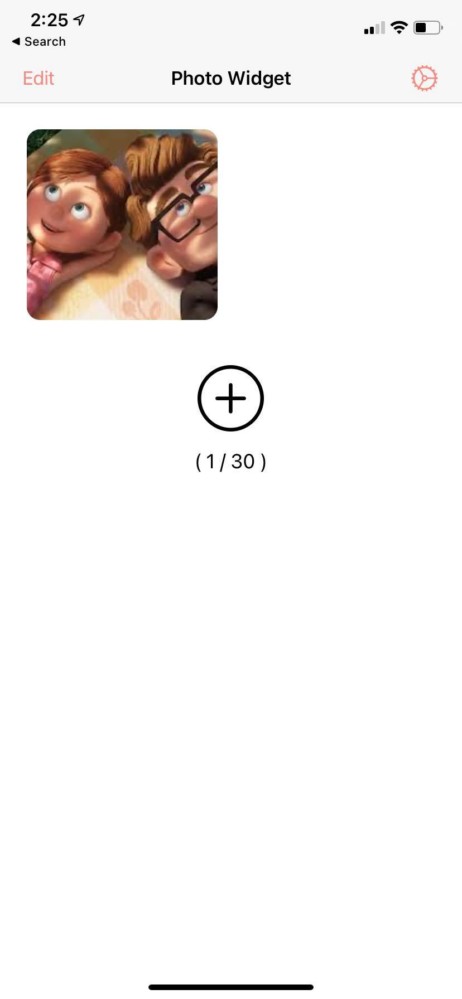
Click on the Plus Sign and follow the prompts to select a picture.
On the iPhone, hold your finger down on any app for 3 seconds and a screen will pop up that says Edit Home Screen.

Click on "Edit Home Screen" and then your apps will start to vibrate. There should be a plus sign in the upper left corner of the screen. Click on it.

Once you click on it, scroll down to select Photo Widget.
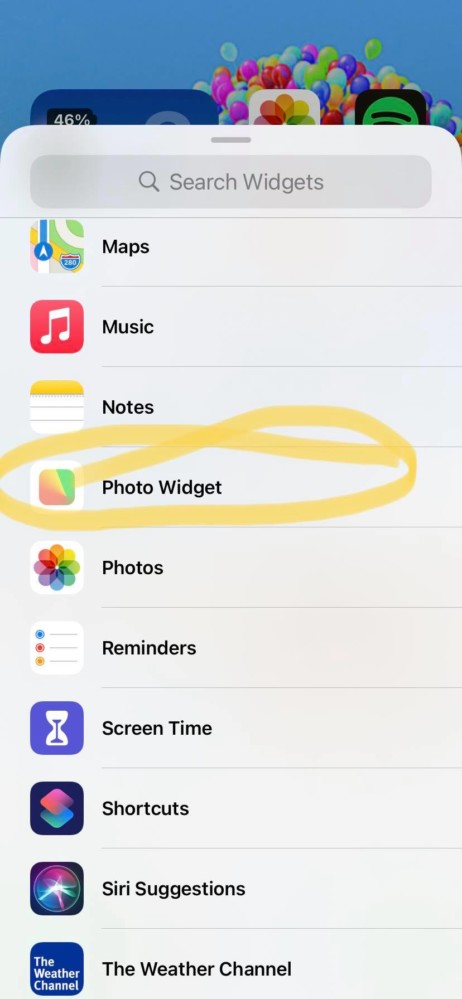
Click on Add Widget and drag it to where you'd like it on you screen.

Your screen should now look something like this with the Disney iPhone Widgets.
#4 – Custom Icons Using Shortcuts
You can take it a step further and create custom icons. These are shortcuts for all your most used apps. You can customize these shortcuts with your own photos.
Word of warning…these are shortcuts and they will delay the opening time of your app. This is not a replacement for the app itself. My daughter spent a few hours customizing her icons. I don't have that amount of time to spend on everything nor do I like the time delay in opening the apps.
But if you want your screen to have custom icons for select apps, I will walk you through the process.

How to set custom icons for apps in iOS 14
1. Open Shortcuts by searching for the word Shortcuts in your iPhone's search bar
2. Click + in the upper right corner
3. Click "Add Action"
4. Click Scripting
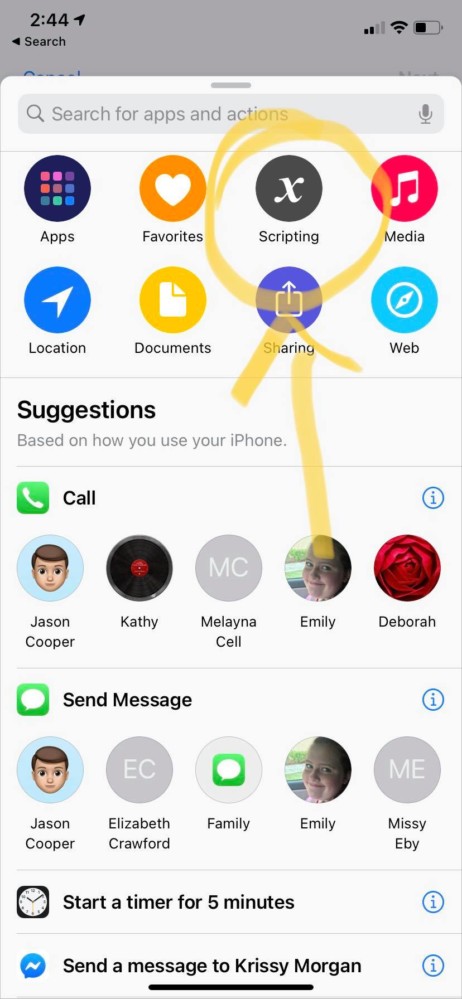
5. Click Open App
6. Click the app you wish to customize
7. Click on the 3 dots to rename it to the name of the app
8. Click Done
9. Click the 3 dots again
10. Click "Add to Home Screen"
11. In the "Home Screen Name and Icon" box, click on the current image of the icon and this box will pop up
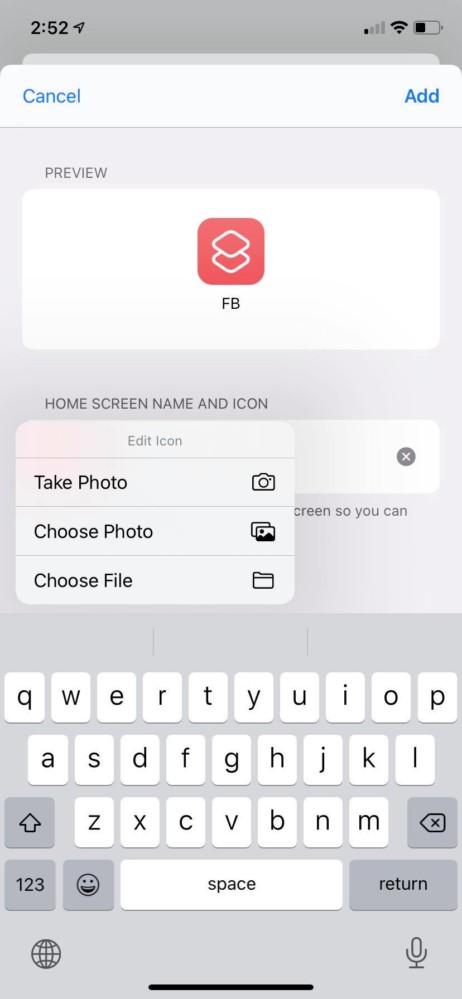
12. Click on Choose Photo
13. Select a photo (I put all the photos I wanted to use for this in my Favorites album to make them easier to find; you can click to albums at the top of the screen)
14. Select the photo
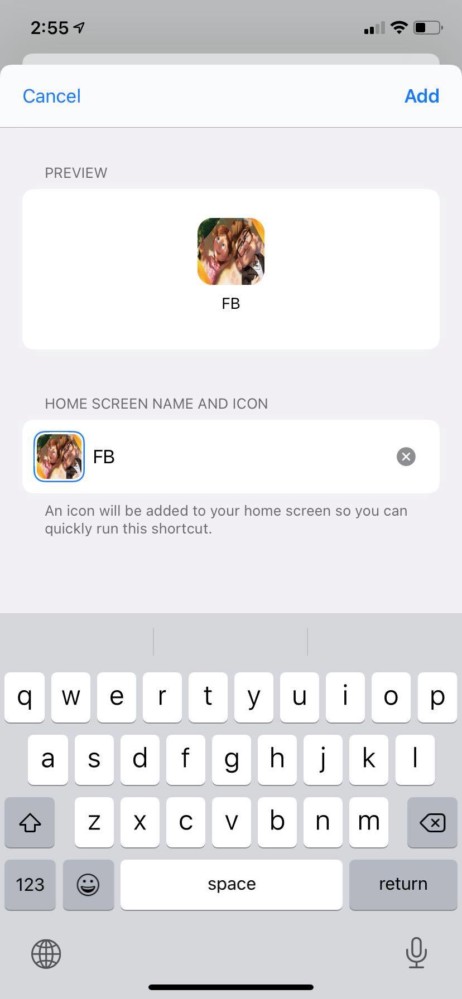
15. Once you are back on this screen, click Add.
16. It will drop the icon onto your phone's home screen somewhere (you know how it does). Scroll to find it. Then drag and drop it to where you want it.
17. Repeat this for every single icon you want to customize. I'd recommend customizing the My Disney Experience one.
After a lot of tedious work, you'll end up with a completely customized home screen like Emily's.

I can't wait to see your Disney iPhone Widgets.
You can also Disneyfy your Facebook Avatar.

Disney Themed Ios 14 Home Screen
Source: https://www.couponingtodisney.com/disney-iphone-widgets-to-customize-iphone-home-screen/
Posted by: petersonhypect1953.blogspot.com

0 Response to "Disney Themed Ios 14 Home Screen"
Post a Comment